
With the B-17 reconstructed I turned my attention to battle
damage, adding additional B-17s and finally bombs.
I experimented with many brush setting in Photoshop to paint smoke
and create fire for the stricken engine. I also used the blur filter and smudge tool.

I figured out a way to make the flak smoke (I don’t remember
the process but it was with much trial and error) and peppered the sky
with as much flak as I thought looked believable.
The Internet once again was my source for the wing damage on
the right wing tip. I found a photo from World War II of real wing damage on a B-24 and used it
for my B-17 damage.

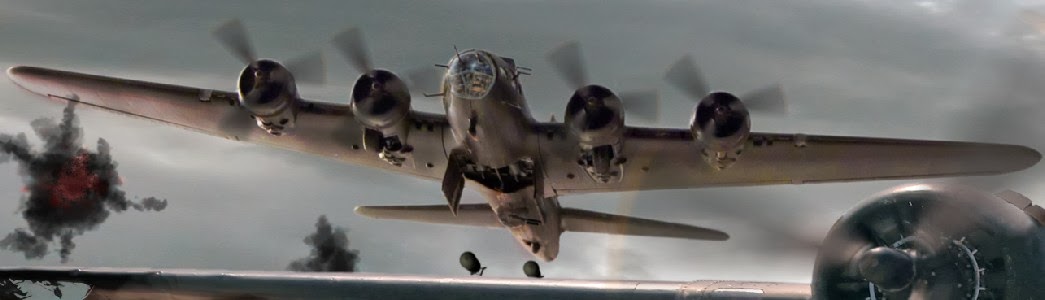
As mentions previously I photographed a scale model of the B-17 in various angles. I added nose art to each plane in Photoshop as well as numbers on the tail. The nose art was lifted from photos of real bombers. On the right B-17 I added some tail damage and each plane had to have it's props blurred. I also added a blur filter to each.
 |
| Nose art, tail number and prop blur added to model photo. Tail damage was added later. |
 For some time I was not going to worry about bombs because I had no clue how I was going to do it but eventually I experimented with some free 3D rendering programs and found a 3D bomb someone made that fit the bill.
 |
| Model with bombs and tail damage layered on the final version. |
 |
| Bombs added to main B-17 |
 |
| Close up of another B-17 model |
 |
| Close up of the final B-17 model |
All the elements of the "then" version was then assembled, re-sized, positioned, various filters and adjustments applied and everything tweaked.
All that was left was to marry it to the "now" version.
 |
| Final compilation |
The full resolution version can be seen HERE. (There is tool on the page to view full resolution sections)
Note:
While preparing for this blog series I noticed some things that I did not see when I first worked on this. For one thing the "then" compilation lacked uniformed grain. For example the bombs, which were computer generated, looked too smooth compared to photographic elements. To rectify this I added a 50% gray layer on top of everything, set the blending mode to overlay, applied an Add Noise filter and a Gaussian Blur filter. I think it helped.
Also as you may be able to see in the close up of the main B-17, the ball turret looked a bit tool sharp so I added some more blur to it. In addition there was some masking that needed cleaning up.
If you look at the current version on the page linked above you will also noticed that I made the stenciled lettering look more like it was actually stenciled.
With something this complex it's a good idea to go back over it after some time has past so you can see it with fresh eyes.
This was my most ambitions Photoshop project and was quite a learning experience. If you have an idea that will require this kind of work and you aren't too sure how you are going to pull it off, just dive in, you'll figure it out as you go.
No comments:
Post a Comment